How To Nail Attic Stair Trim
How To Install Attic Stairs Trim Step By Step Plans Video Copewood

Trim Frame Before Or After Putting Up Attic Ladder Finish Carpentry Contractor Talk

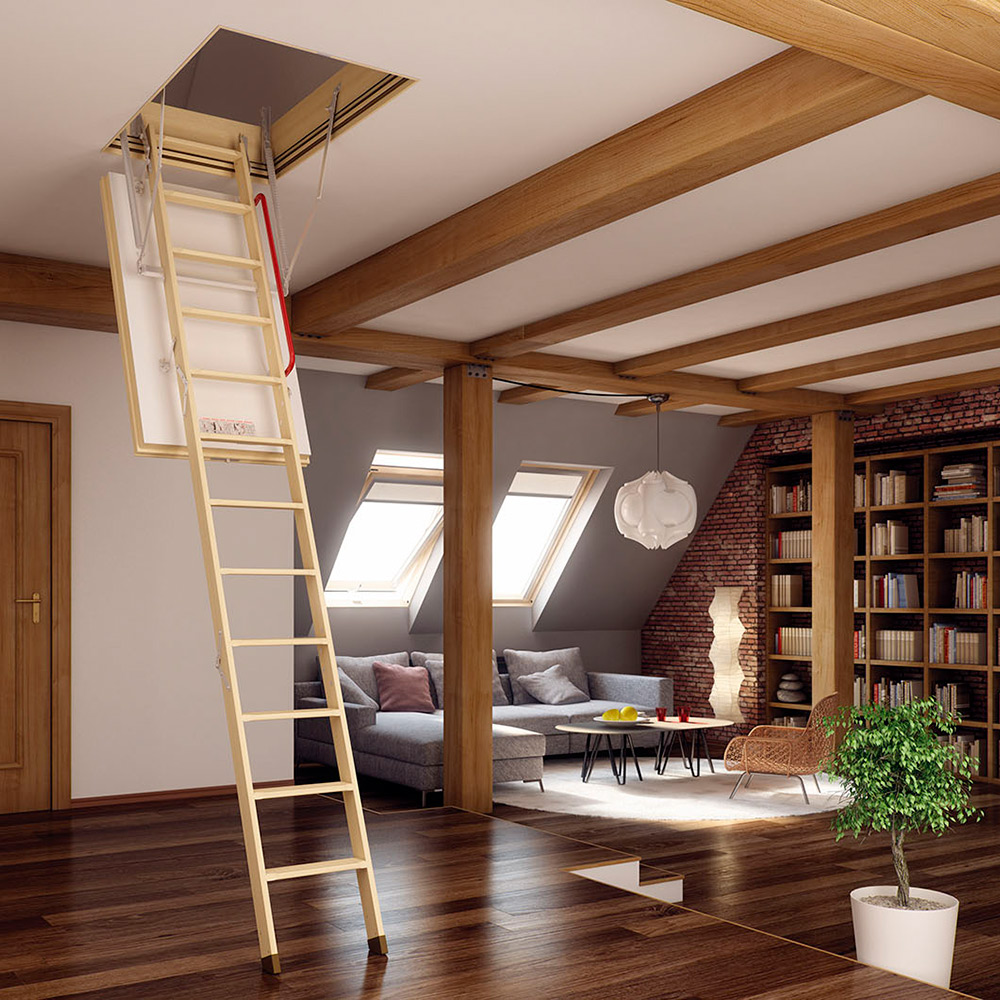
How To Install Pull Down Attic Stairs

Pull Down Attic Stairs Hook Google Search Attic Stairs Pull Down Attic Stairs Attic Remodel

How To Install An Attic Ladder Youtube

My Attic Door For Pull Down Stairs Attic Doors Attic Renovation Attic Access Door

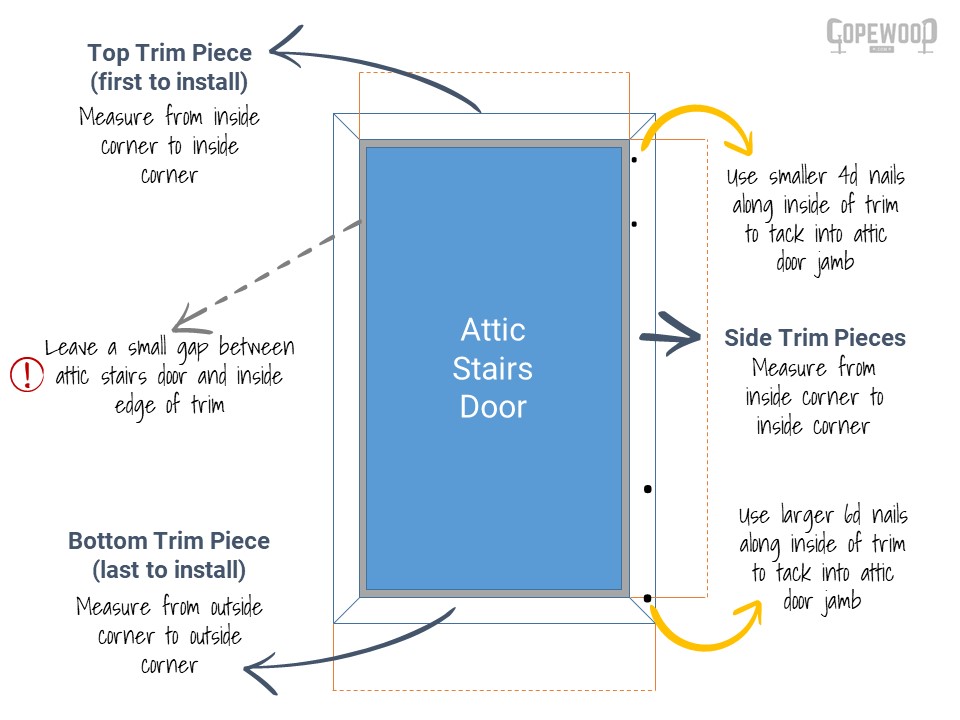
Work from a stepladder and measure across one of the short sides of the stair frame from corner to corner.
How to nail attic stair trim.

Installing An Attic Ladder

Striped Wall And Tip For Attic Doors Attic Doors Attic Renovation Attic Flooring

House Tour Guest Bedroom Attic Doors Attic Renovation Attic Stairs
/cdn.vox-cdn.com/uploads/chorus_image/image/65891558/attic_access_x.0.jpg)
How To Install Pull Down Attic Stairs This Old House
Hiding The Cord In A Pull Down Attic Stair Access Attic Renovation Attic Remodel Attic Storage

How To Replace Attic Cord With Hook And Pull Attic Renovation Attic Rooms Attic Design

Trim Frame Before Or After Putting Up Attic Ladder Page 2 Finish Carpentry Contractor Talk

Installing The Pull Down Attic Ladder Project Small House

How To Install Attic Ladder Easy To Follow

How To Install Trim Around Attic Stairs Copewood Youtube
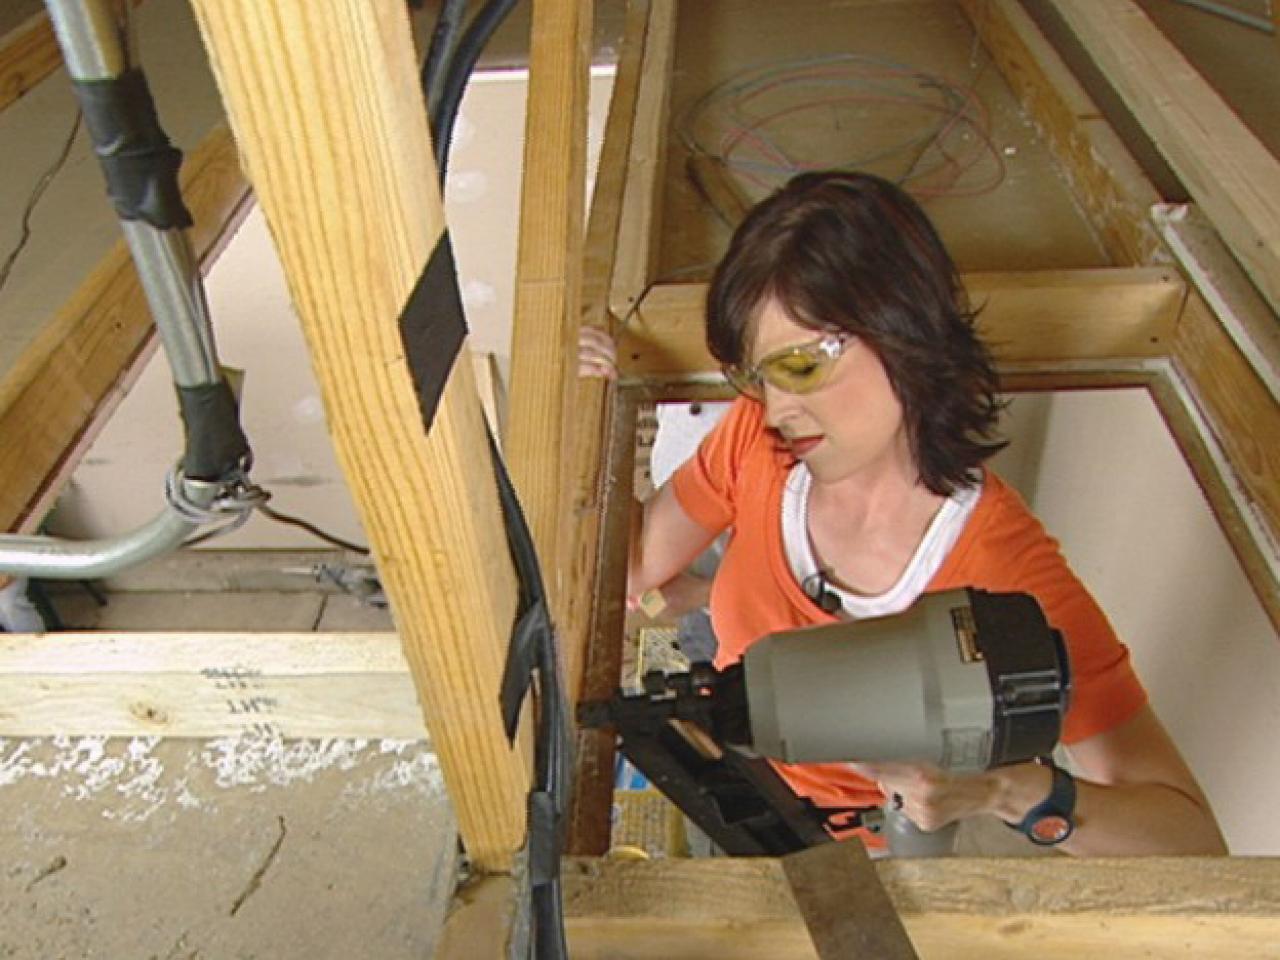
How To Install An Attic Ladder How Tos Diy
Installing Trim Around An Attic Ladder

Umberto Fusco Uploaded This Image To 39 Garage Fix 39 See The Album On Photobucket Attic Renovation Attic Flooring Attic Access Door

Installing Stairway Molding In Your House Stairs Trim Staircase Molding Stairs Design

Installing The Pull Down Attic Ladder With Images Attic Remodel Attic Storage Attic Flooring

How To Install An Attic Ladder Secrets Tricks That You Should Know

Boys Bedroom Ideas To Help You Create A Fun Room For Your Little Guy Boys Bedrooms Attic Doors Attic Flooring
Attic Ladder Installation The Home Depot
Https Encrypted Tbn0 Gstatic Com Images Q Tbn 3aand9gcskdnbnlc4lczeovkybwlu9ginprnty1bin2pnuq X7janltcbc Usqp Cau

Installing The Pull Down Attic Ladder With Images Attic Renovation Attic Remodel Attic Design

How To Install Beadboard Paneling Pine And Prospect Home Diy Stairs Stairs Trim Stair Moulding

Nail Head Stair Runner Trim Stairs Stair Runner Residential Flooring

How To Insulate And Air Seal Pull Down Attic Stairs Greenbuildingadvisor
/cdn.vox-cdn.com/uploads/chorus_asset/file/19616504/tom_attic_stairs.jpg)
How To Replace A Pull Down Attic Staircase This Old House
Source : pinterest.com
